How to Reduce Monitor Glare in a Home Office
Monitor glare is usually easier to fix with placement and lighting changes than with a new accessory. Start by moving the screen so a window or lamp is not reflected in it, soften strong daylight with blinds or curtains, and aim task lighting at the desk rather than the display. Then adjust screen brightness, contrast, and text size for the room.
The key is to change one variable at a time. A bright patch on the screen, a washed-out image, and text that simply looks too small can feel similar during a long workday, but they need different fixes. This guide helps you identify the source first, make the no-cost changes, and buy an anti-glare accessory only if your room leaves no practical alternative.
The Five-Minute Glare Check
Keep the same chair position, document, screen brightness and zoom while testing one light source at a time. A dark screen can help locate a reflection; return to your normal work to judge readability.
- Check direct light. Is an exposed lamp or bright window in your normal field of view? Briefly block that light path with a folder without hiding the screen. If visibility improves, investigate the source position or shading.
- Check reflected light. Look at the display from your normal seated position. Briefly shade light falling on the panel from above or one side. If a bright patch disappears or details become clearer, reflected light may contribute.
- Change one source. Adjust one blind, switch off one task lamp, or move one lamp. Reopen the same document with unchanged display settings, then restore the original condition where practical to compare.
- Check readability separately. If no reflection explains the difficulty, test larger text without moving the monitor. Follow the display manufacturer’s cleaning instructions if smudges obscure the result.
This sequence adapts CCOHS’s direct and reflected glare checks. A changed result identifies a condition to investigate; it does not establish a medical cause or prove that a new product is needed.
Placement and diagnostic guidance reviewed October 22, 2026; the window-position schematic was added October 29, 2026. This is a documentation-based setup guide, not a tested room configuration.
Three window positions, three different checks
Top-down schematic. “You” is your seated viewing position; the dark bar is the screen. These diagrams show positions, not measured light paths.
1 · Window behind you
Look for: a reflected window on the display. Test the blind position or rotate the setup, then reopen the same document.
2 · Window behind the screen
Look for: a bright background in your sightline. Shade it or change the orientation while keeping useful room light.
3 · Window to the side
Try first: side-on placement with adjustable shading. Check both screens and the time of day when the problem occurs.
Match the Observation to the First Change
| Observation | Check one condition | First change to compare |
|---|---|---|
| A window or lamp is visible in the panel | Does shading light falling on the screen improve detail? | Change source position, blinds or screen angle |
| A bright source is beside or behind the display | Does blocking it from your field of view help? | Shade or reposition the source; keep useful room light |
| No obvious reflection, but text is difficult to read | Does larger text help at the same distance? | Adjust text size before changing the whole lighting setup |
| The screen is readable but paper is dim | Is light reaching the document? | Aim existing task lighting at the paper without reflecting on the screen |
| The problem appears at one time of day | Does it follow sun or blind position? | Record a repeatable daylight setting and retest at that time |
Several conditions can coexist. A desk lux reading measures incident light on that surface; it does not identify a reflected window or establish whether the screen is readable. Use our desk-lighting measurement guide when the remaining issue is illumination on the keyboard or paper.
1. Position the Monitor Sideways to the Window
A useful starting point is to place the monitor roughly perpendicular to the main window. In other words, the window should be to your side rather than directly in front of or behind the screen.
A window behind the monitor can create a very bright background in your field of view. A window behind you can appear as a reflection on the display. A side-on arrangement reduces both problems and makes daylight easier to manage with a small change in blind position.
You do not need to rebuild the room immediately. Try rotating the monitor first, then the desk if necessary. Even a modest angle can move a reflected window out of your normal viewing area. Reopen the same document after each change so you can judge the result consistently.
2. Control Daylight Without Making the Room Dark
Blinds, curtains, or a shade let you reduce direct light while keeping useful daylight in the room. Adjustable blinds are especially helpful when the sun angle changes during the day. Close them only as much as needed to remove the bright reflection.
A completely dark room with a bright monitor can create another uncomfortable contrast. The goal is not maximum darkness; it is a balanced workspace without an intense light source on or immediately around the display. CCOHS recommends avoiding large transitions between bright and dark areas and adjusting monitor brightness and contrast appropriately.
If sunlight crosses the screen for only an hour, save a “sunny-hour” blind position rather than changing your entire desk layout. A small mark on the blind cord or a note in your workspace can make the adjustment repeatable.
3. Aim Task Lighting at the Work Surface
A desk lamp should illuminate your keyboard, notes or other work without shining into your eyes or reflecting from the monitor. For handwriting, try the opposite side from your writing hand to limit its shadow, then aim the beam at the page. Watch the screen while moving the lamp; a useful paper-lighting position may still need an angle change to avoid a reflection.
Paper documents often need more local light than a backlit screen. An adjustable lamp lets you light the paper without increasing the brightness of the whole room. If your current lamp cannot be aimed precisely, our research-based guide to the best desk lamps for a home office explains which adjustment features matter. Fix the placement first, however; a more expensive lamp pointed at the screen will still produce glare.
4. Adjust Monitor Height, Tilt, and Distance Together
Tilt changes what the screen reflects. Moving the top edge slightly forward or backward may remove a ceiling-light reflection, but large tilt changes can make the display harder to view or encourage an awkward neck position. OSHA specifically notes that tilting a monitor back can sometimes introduce glare from overhead lighting.
Start from a comfortable ergonomic position, then make small angle changes. Our guide to how high your monitor should be covers the top-edge and downward-viewing starting points. Also check monitor distance from your eyes before moving the screen closer just to overcome a dim or reflected image.
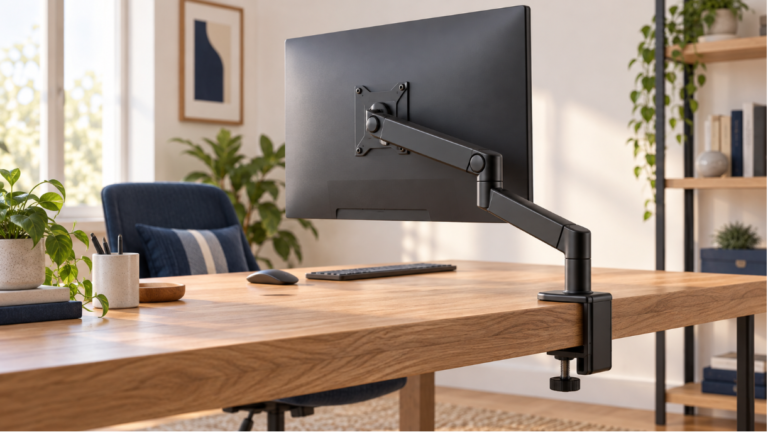
If changing the angle removes glare but places the screen too high, low, or far away, the stand may be the real limitation. That is when an adjustable monitor arm or a suitable stand can solve a specific fit problem. Measure the range you need and confirm compatibility instead of treating an arm as an automatic upgrade.
5. Match Screen Brightness to the Room
Increasing brightness can make content temporarily more visible, but it does not remove a reflected window. It can also make the screen feel excessively bright after the daylight fades. Adjust room light and reflections first, then set the monitor so white areas look comfortably bright rather than like a light source pointed at you.
Use a normal email, document, and spreadsheet as your test. Increase text scaling or browser zoom if the screen is clear but the type is too small. Changing font size is often a better response than leaning forward, moving the monitor too close, or driving brightness to its maximum.
Light and dark interface themes are personal choices. CCOHS notes that dark characters on a light background tend to be less affected by reflections and resemble printed material, but neither mode is universally best. Choose the mode that stays readable in your actual room and application.
6. Clean the Screen the Safe Way
Dust, fingerprints, and dried cleaning marks can make reflections more noticeable. Turn off the monitor so smudges are easier to see, and follow the manufacturer’s cleaning instructions. A clean, soft microfiber cloth is commonly recommended, but coating requirements vary, so avoid assuming that a household glass cleaner is safe for your display.
Cleaning will not fix a window reflected in a glossy panel, but it removes one variable before you spend money or rearrange furniture.
7. Consider an Anti-Glare Filter Last
An anti-glare or matte screen filter may help when the desk cannot move, the window cannot be covered adequately, or a shared room has lighting you do not control. It is a workaround for a known constraint, not the first step.
CCOHS recommends controlling glare through lighting design and monitor placement before relying on an anti-glare screen. Filters can also change perceived sharpness, contrast, or color. That tradeoff may matter for photo, video, and design work. Check the exact screen size, aspect ratio, attachment method, finish, and return policy before buying.
Special Cases: Laptops and Multiple Monitors
Laptop-only setup
A laptop screen often sits low and changes angle whenever you adjust the keyboard position. For longer sessions, a stand with an external keyboard and mouse lets you set screen angle, height, and distance independently. First test the laptop in the proposed raised position to make sure it does not simply catch an overhead light.
Two monitors
Check each screen separately. A side monitor may reflect a window even when the centered screen does not. If one display is primary, keep it directly ahead and angle the secondary display inward. With equal use, arrange the screens in a shallow arc and test the outer edges for reflections.
Shared or sit-stand desk
Glare can change when the monitor moves vertically. Check both seated and standing presets at the times of day you normally work. Save separate monitor tilt or blind settings if needed rather than accepting one compromised position.
Record the Setting That Works at the Problem Time
Write down the time, weather, blind position, lamp state and the part of the screen affected. Keep the same work document for the comparison. If a change helps at noon, repeat the check at the hour when the original problem usually occurs before treating it as a lasting solution.
For example, a reflection that disappears when one desk lamp is switched off suggests checking that lamp’s direction before buying a screen filter. If the reflection remains unchanged with that lamp off, test another source rather than assuming a brighter replacement lamp will help. This is an illustrative reasoning example, not a result from our testing.
If paper becomes too dark after controlling glare, check the local work area using our lux and task-lighting guide. For the rest of the workstation, use our home office setup guide.
Frequently Asked Questions
Should a monitor face a window?
Usually, no. A practical starting point is to place the screen perpendicular to the window so daylight comes from the side. This avoids putting a bright window directly behind the monitor or reflecting a window located behind you.
Will a brighter monitor eliminate glare?
Not necessarily. More brightness may overpower a reflection temporarily, but the reflection remains and the screen may become too bright when room lighting changes. Control the light source and placement first, then adjust brightness.
Is an anti-glare screen protector worth it?
It can be useful when you cannot reposition the screen or control the light. Try desk orientation, blinds, lamp placement, monitor angle, and cleaning first. A matte filter may reduce reflections but can also affect sharpness, contrast, or color.
Where should a desk lamp go relative to the monitor?
Place it where it can light your keyboard, paper, or desk without shining on the screen or into your eyes. A side position with the lamp aimed downward is a useful starting point, but test it from your normal seated view.
| Remaining problem | Compare next | Check before buying |
|---|---|---|
| Paper or keyboard needs light; monitor top is usable | Monitor light-bar options | Mount shape, webcam clearance, USB power and reflections |
| Light must move between documents or sit away from the monitor | Adjustable desk lamps | Reach, base or clamp space, and beam direction |
| Window or lamp still reflects in the screen | Glare diagnosis first | A new light bar will not remove an uncontrolled window reflection |
Final Takeaway
To reduce monitor glare in a home office, diagnose the reflected light before changing the screen. Put the window to the side, control direct daylight, aim task lighting at the desk, and make small monitor-angle adjustments. Then fine-tune brightness, contrast, text size, and cleaning.
Only shop after you can name the remaining limitation: a fixed stand, an uncontrollable window, or a lamp that cannot be directed. That order keeps the setup practical and avoids paying for an accessory that does not address the real source of the glare.