How to Manage Cables Under a Home Office Desk
Home office cable management works best when you organize the route before buying organizers. Put the laptop, monitor, keyboard, and mouse where you actually want to use them. Then remove unused connections, support the cables that remain, and keep the route to the wall away from your feet and chair wheels.
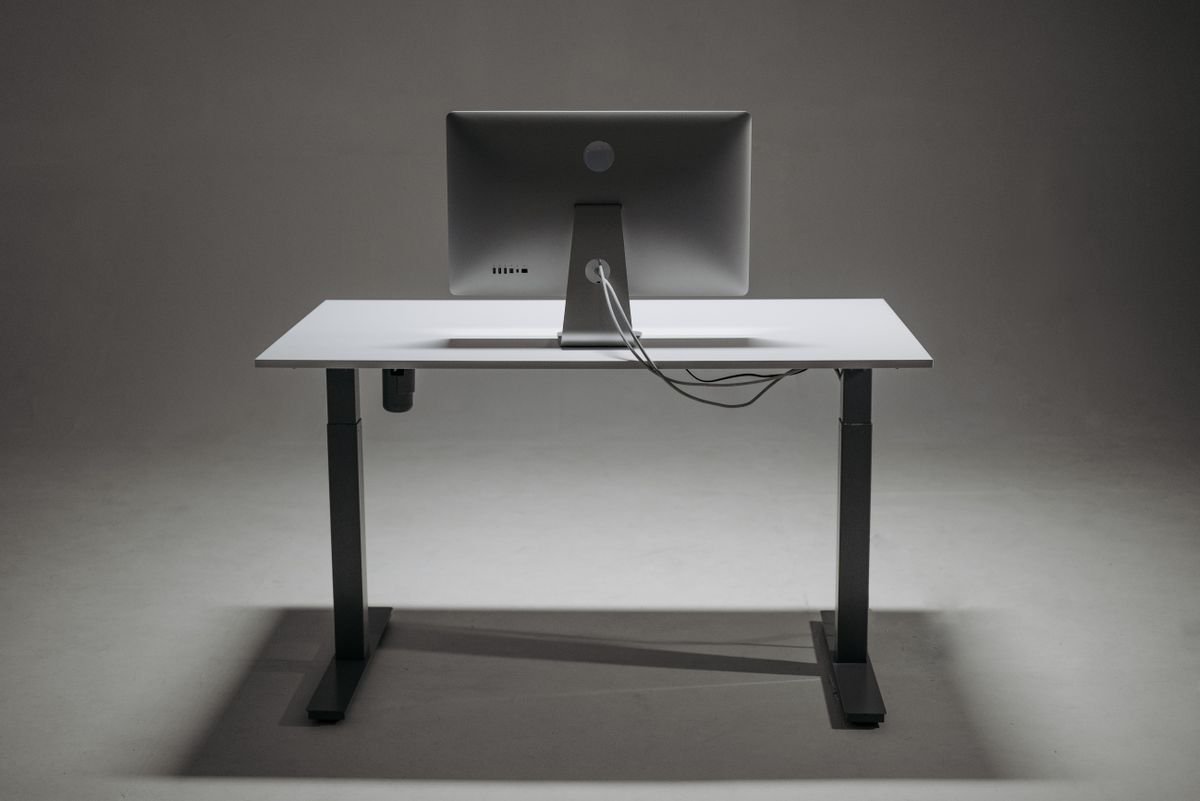
Quick answer: work in three zones: the desktop connections, the rear underside of the desk, and the route to the wall. Use reusable straps for cables you may change, a suitable tray when loose items need support, and enough slack for every device or desk part that moves. Check access and movement before making the arrangement permanent.
This is a research-based setup guide, not a hands-on organizer test. Manufacturer instructions and electrical-safety sources are linked where relevant. Workspace photographs illustrate layout choices; they do not show products we have tested.
Start With the Desk Layout, Not the Cable Tray
A tidy bundle is not useful if it forces the mouse out of reach or pulls the laptop off its stand. Arrange the equipment first, including anything you move regularly. Mark the normal position of the laptop and the farthest position of a monitor arm before deciding where cables should be secured.
Our ergonomic laptop setup guide explains the order for positioning the screen and separate input devices. Cable routing comes after those choices. Leave the usable desk surface available for your work instead of choosing a comfortable position only from wherever the existing cords happen to reach.
Next, make a simple connection list: device, destination, whether it moves, and whether you unplug it daily. You do not need a spreadsheet. A note such as “monitor to dock, stays connected” helps distinguish a permanent connection from the laptop cable that must remain accessible.
A Three-Zone Plan for Home Office Cable Management
| Zone | What belongs here | What to check |
|---|---|---|
| Desktop connections | Laptop lead, monitor leads, and occasional charging cables | Comfortable reach and slack at the device |
| Rear underside | Supported cable routes and approved mounting locations | Desk fit, load limits, ventilation, and plug access |
| Desk to wall | The remaining power or network route | Clear feet, chair wheels, and any desk movement |
This is our organizing framework, not a universal installation specification. A fixed desk beside a wall may need only a few straps. A desk in the middle of a room or a height-adjustable workstation needs more attention to the final route. The particular desk and accessory instructions decide what mounting is allowed.
1. Remove Unused Cables and Label What Remains
Before disconnecting equipment, save your work, shut down devices as their instructions require, and disconnect power before handling or mounting power equipment. Photograph the existing connections so you can restore them. Remove the charger for a device you no longer use rather than hiding it with everything else.
Trace each cable from end to end. A small label near the connector can identify the monitor, dock, or laptop supply when several black cables look identical. Use a description you will recognize later, not a technical label that requires another lookup. Keep model labels and safety markings visible.
Separate the daily laptop connection from the cables that stay put. If a hub or dock is part of the setup, our USB-C hub vs docking station guide helps you check whether it actually meets your connection needs. Buying a dock solely to hide cables may add a power supply and host cable without solving the layout problem.
2. Give Cables a Supported Route Under the Desk
Plan the route along the rear underside where practical, leaving the space near your knees clear. Look for the desk frame, drawers, braces, controller, and existing mounting points before choosing a tray location. A tray that fits the desktop width can still collide with a drawer or prevent a monitor-arm clamp from seating correctly.
Check how an organizer attaches. A clamp needs a compatible edge and sufficient clearance; an adhesive mount needs the surface preparation and curing time specified by its maker. A screw-mounted tray needs an approved mounting surface and the right fasteners. Do not assume a glass, hollow, thin, or unusually shaped desktop can accept the same installation as solid wood.
For a concrete example, Herman Miller’s Jarvis cable-management kit uses a tray and specifies drilling for mounting. That illustrates why the attachment method matters; it is not a recommendation to drill your particular desk. Follow the instructions for the exact furniture and organizer you own.
Support heavier items separately using approved holders or mounting features, and respect the organizer’s load limit. Do not leave a power brick hanging by its cable or use a light cable clip to carry equipment it was not designed to hold. Keep required ventilation around adapters and desk electronics, and leave switches and connectors reachable.
3. Bundle for Access, Not for the Tightest Appearance
Reusable hook-and-loop straps are a practical first choice when you expect to swap devices. Group cables by destination so a monitor lead can be released without dismantling the whole workstation. Fasten gently enough to support the route without crushing a cable or pulling on a connector.
Leave a modest service loop at equipment you need to reposition or unplug. The right amount depends on the movement and cable requirements, so there is no useful universal number of inches. Avoid sharp turns, and follow any bend-radius requirements supplied for your cable.
Contain excess length without packing powered equipment or cords into a tightly stuffed enclosure. A sleeve can make a loose route easier to manage, but it should not make inspection or access impossible. If a bundle requires force to close the sleeve, reconsider the grouping or organizer size.
Keep your frequently removed laptop cable near its normal connection point. A small compatible clip can stop an unplugged lead falling behind the desk. It should hold the cable jacket without trapping the connector or making you tug the cable to release it. For a light lead on a compatible surface, see the INCHOR cable-clip fit checks and Amazon listing. That buying guide contains affiliate links; clips are not supports for power strips or other heavy equipment.
4. Check the Route From the Desk to the Wall
Once desktop and under-desk connections are supported, inspect the remaining route at floor level. Sit down, roll the chair into your normal position, and check where your feet land. Move a footrest if you use one. A route that looks hidden from the doorway may still cross the area you use all day.
Keep cords away from chair wheels and places where furniture can pinch them. The U.S. Fire Administration’s electrical-safety guidance advises avoiding cord damage or pinching, including under carpets and rugs. Hiding a cord under a rug is not a cable-management solution.
Read the ratings and instructions for your power equipment. Do not overload outlets or power strips, and do not connect power strips to one another. The CPSC’s extension-cord and power-strip guidance warns against overloads and treats extension cords as temporary arrangements. A cable tray does not change an electrical device’s rating.
If the outlet is too far away, reconsider the desk location or ask a qualified electrician about a suitable permanent solution. Do not conceal damaged equipment just because it still works. Stop using equipment with damaged cords and follow the manufacturer’s replacement or service instructions.
Standing Desks Need a Movement Check
On a height-adjustable desk, a cable can fit perfectly while seated and become too short when the desktop rises. Check every connection to something that does not move with the desk, including a wall outlet, network socket, printer, or computer on the floor.
UPLIFT’s Parsons desk instructions require enough slack in desk and accessory cords throughout movement and at maximum height. Use your own desk’s instructions to determine the permitted travel and routing; the principle does not make every accessory compatible with every desk.
Before final fastening, check the highest and lowest positions permitted by the desk manufacturer, keeping people and obstacles clear. Observe the cables while operating the desk as directed. Stop if a lead tightens, catches, or moves connected equipment. At the low position, check that spare length stays out of the chair and foot area.
Make the same check when repositioning a monitor arm or moving a laptop on its stand. Our sitting vs standing desk guide discusses the wider workstation choice. A moving desk needs a route that works at both positions, not just a tidy photograph at one height.
Our under-desk cable tray buying guide compares mounting requirements, published dimensions, and the fit checks to make before ordering.
Which Organizer Do You Actually Need?
| Your remaining problem | A sensible starting point | Reason to pause |
|---|---|---|
| A few loose leads | Reusable straps and compatible cable clips | The clips would have to support heavy equipment |
| Several unsupported connections under the desk | A tray or holder with approved attachment and adequate capacity | Desk material or mounting clearance is uncertain |
| A laptop lead keeps falling behind the desktop | An accessible clip suited to the cable | The clip pinches the lead or blocks the connector |
| The wall route crosses the foot area | A different desk position or suitable route | You would have to hide it under a rug |
| Connections pull when the desk rises | Correct routing and suitable cable reach | You cannot meet the desk’s movement instructions |
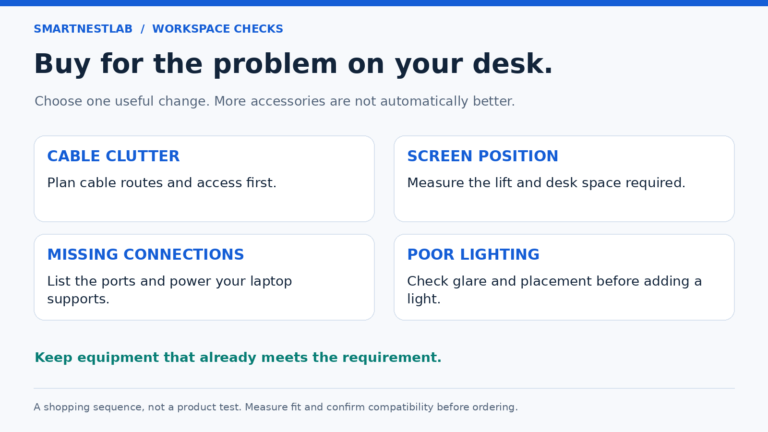
Buy for the remaining problem after you remove unused equipment. Measure the available mounting space and check package contents before ordering. Our home-office desk accessories guide covers related workspace tools and contains affiliate links. This setup method does not depend on purchasing a particular organizer.
A Final Check Before You Finish
- Can you sit, move your feet, and roll the chair without touching cords?
- Can you disconnect the laptop without releasing permanent connections?
- Are equipment weight and cable slack supported appropriately?
- Can you reach plugs and switches without pulling on leads?
- Are ratings, ventilation openings, and inspection points accessible?
- If the desk or monitor moves, does the route work through its permitted movement?
- Do the monitor, keyboard, network, and charging connections still work?
Use the desk for a normal work session before adding more permanent fastening. Notice what you still reach for or reposition. Recheck the route whenever you add a device or move the desk. Good home office cable management leaves you with fewer obstacles and easier maintenance, while preserving the layout you actually want to work in.
Frequently Asked Questions
Do I need an under-desk cable tray?
Only if the remaining cables or permitted equipment need support that simpler clips and straps cannot provide. Check fit and installation requirements first. A small setup may need no tray at all.
Should every cable be hidden?
No. Keep daily connections accessible and maintain the slack required by moving equipment. A visible, supported lead is more practical than a hidden one that pulls or cannot be inspected.
Can I use the same route on a standing desk?
The organizing sequence is similar, but you must check the desk’s full permitted movement. Cables to the wall or other stationary equipment need enough reach without becoming obstacles when the desk lowers.
What should I buy first?
Remove unused cables and arrange the devices first. Then choose the smallest set of compatible organizers that solves the remaining problems. Usually the route and mounting method matter more than how many pieces a kit includes.